
The thought of installing a stair runner on your own can be a bit daunting at first. The stairs are such a prominent part of a home, and any misstep (no pun intended) in the installation could lead to a less – than – ideal result. However, let me tell you from personal experience, it’s a task that’s not only achievable but also incredibly rewarding. In fact, we’ve taken on this project not just once, but twice! And if you count our foray into the world of live TV demonstrations, it’s a grand total of three times. So, fear not, dear reader, as we’re about to take you through a detailed tutorial that will have you confidently installing your own stair runner in no time.
Why You Need a Stair Runner
A stair runner is far more than just a decorative element for your staircase. It’s a multi – functional addition that brings a host of benefits to your home. Firstly, in terms of safety, it’s a game – changer. We’ve all had those moments where we’ve felt a bit unsteady on the stairs, and a well – installed stair runner can significantly reduce the risk of slips and falls. It provides that extra bit of traction, making every step more secure. Our furry friends also appreciate it. We noticed that our dog, who used to be a bit hesitant on the bare stairs, now bounds up and down with much more confidence.
Sound absorption is another great advantage. If you have kids in the house, you know how noisy they can be when running up and down the stairs. A stair runner acts as a natural sound buffer, dampening the sound of those energetic footsteps. So, if you have young children, pets, or even a few clumsy adults in the household, a stair runner is a must – have. It’s a simple yet effective way to make your home a safer and more peaceful place.
Our DIY Transformations
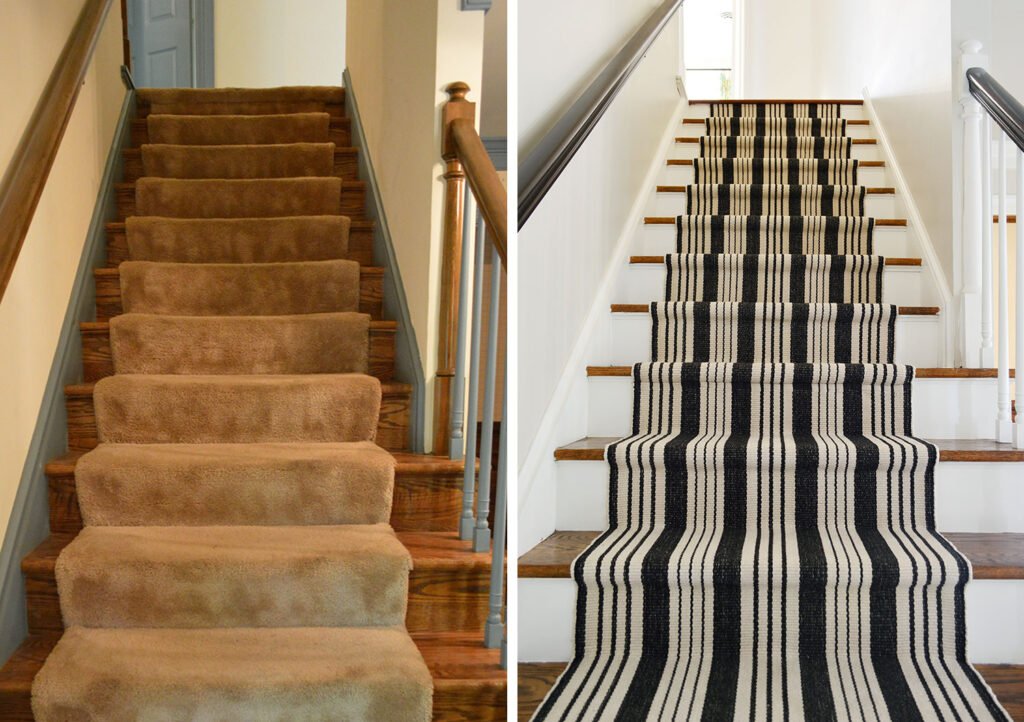
Our first encounter with stair runner installation was when we moved into a house that came with a rather lackluster, dingy carpet runner. It was one of those eyesores that you can’t help but notice every time you walk up or down the stairs. We decided it was time for a change. We opted for a bold, striped rug that immediately breathed new life into the staircase. To complete the look, we painted the risers, trim, and balusters a crisp white and stained the wood handrails a rich, dark color. The result was a staircase that looked modern, stylish, and inviting. It was as if we had transformed the entire entrance of our home.
Fast forward to our current home, and we were at it again. This time, we wanted a more beachy, laid – back vibe. So, we chose a beautiful sisal runner. To complement the natural texture of the sisal, we painted the treads a soft, wary gray. The combination was perfect, creating a coastal – inspired look that made us feel like we were on a permanent vacation every time we used the stairs.
Our third adventure with stair runners was a bit different. We were invited to be part of a DIY segment on The Rachael Ray Show. While we only managed to show a few staples being put in on camera, we had spent hours prepping a small, fake staircase backstage. It was a shame we couldn’t do a full – scale installation on air, as the runner we had chosen was absolutely adorable. But it was still a fun and exciting experience that allowed us to share our love of DIY projects with a wider audience.
The Installation Process
Now, let’s get down to the nitty – gritty of actually installing a stair runner. The first and perhaps most crucial step is getting the right measurements. You need to measure the length and width of each step accurately. This will ensure that your rug fits perfectly and looks seamless when installed. We have a little trick for this. Use a long string or a flexible measuring tape to follow the contour of the stairs. Mark the string at each step’s end and then measure the string. This way, you get a precise measurement that accounts for any irregularities in the stairs.
Once you have your measurements, it’s time to choose your stair runner. There are so many options available, from different materials like wool, cotton, or sisal to a wide range of colors and patterns. Consider the style of your home and the overall look you want to achieve.
Next, you’ll need to gather your tools. You’ll need a staple gun, staples, a pair of scissors, and a carpet pad for added cushioning and stability. Start by laying the carpet pad on the stairs, securing it with staples. Then, carefully position the stair runner on top of the pad. Start at the top of the stairs and work your way down, making sure the runner is straight and centered. Use the staple gun to secure the runner to the steps, being careful not to staple too close to the edge as it might cause the fabric to fray.
Trim any excess runner with your scissors. It’s important to take your time with this step to ensure a clean, professional finish. And there you have it! With a little patience and some elbow grease, you’ll have a beautiful stair runner that not only looks great but also adds functionality to your home. So, are you ready to take on this DIY project? What kind of stair runner are you envisioning for your home?

