
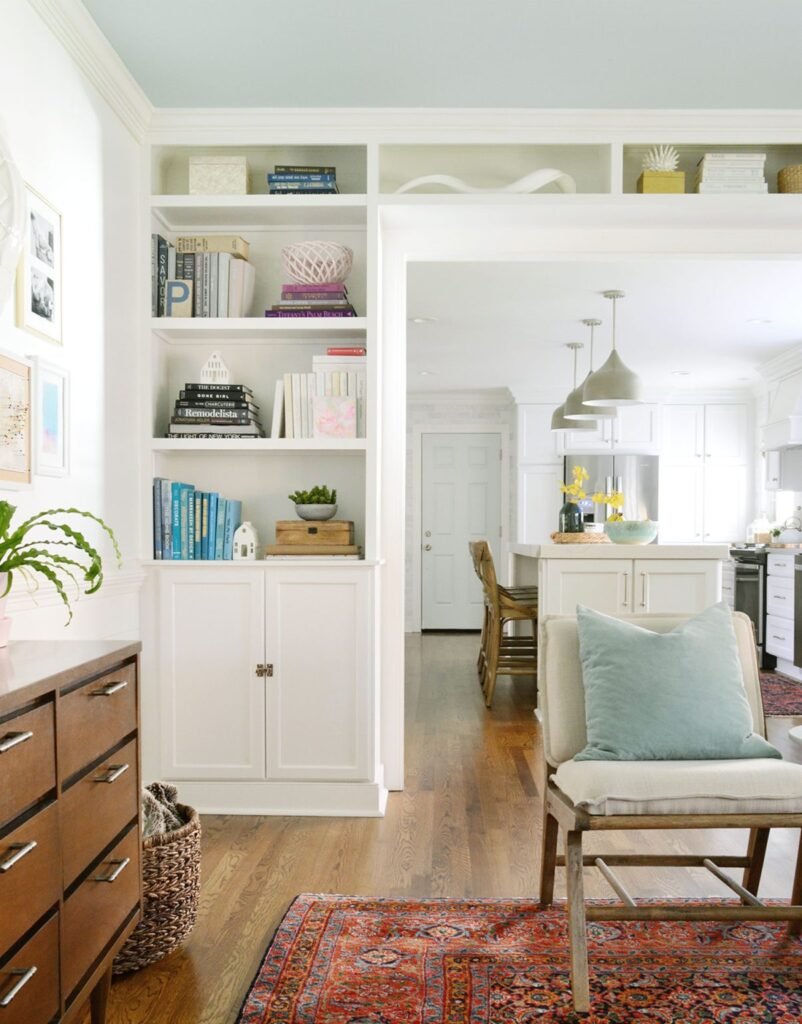
The allure of built – in bookshelves is undeniable. They add a touch of elegance and functionality to any room, creating a cozy nook for books and cherished decor items. What if I told you that achieving this classic look of floor – to – ceiling shelving around a doorway is more accessible than you might think? In this DIY tutorial, we’ll take you through the process step by step, sharing our experience of integrating these beautiful bookshelves into our kitchen remodel.
Our journey began with a wall that already had a bookcase, as you can see in the “before” photo. However, as part of our extensive kitchen renovation plans, we decided to demo and reframe it. Our goal was to make the space more open and connected to the kitchen, and these built – in bookshelves were the perfect addition. In fact, they’ve quickly become my personal favorite aspect of the entire remodel.
Tools and Materials: Your Starting Point
Before diving into the project, it’s essential to gather all the necessary tools and materials. This is a multi – day endeavor that demands patience and precision, but fear not, as it only requires basic DIY skills. You’ll need a measuring tape to ensure accurate dimensions, a saw to cut the wood to size, a drill for securing the pieces together, and a level to make sure everything is straight.
For materials, you’ll need high – quality lumber for the shelves, sides, and bases. Plywood can be a great option for the back of the bookshelves. Don’t forget about paint or stain to give your creation a finish that matches your decor. We chose a beautiful Simply White paint that brightens up the space and gives the bookshelves a clean, fresh look.
The Step – by – Step Process

Step 1: Plan Your Bookshelf Design
The first and most crucial step is planning. Decide on the layout of your bookshelves, taking into account the size of the space, the types of items you’ll be storing, and your aesthetic preferences. Measure the area carefully, considering the height and depth of the shelves. For example, if you have large coffee table books, you’ll need deeper shelves.
Step 2: Build – In Your Bases
Start by constructing the bases of your bookshelves. Cut the lumber to the appropriate length and width and assemble the pieces using your drill. Make sure the bases are level and sturdy, as they’ll support the entire structure.
Step 3: Prime, & Paint
Before moving on to the next steps, it’s a good idea to prime and paint the pieces. This not only protects the wood but also makes the final painting process easier. Apply a coat of primer and let it dry thoroughly before painting with your chosen color.
Step 4: Construct Your Side Shelves
Once the bases are done, it’s time to build the side shelves. Cut the wood for the sides and attach them to the bases. Use a level to ensure they’re straight. You can add additional support braces if needed.
Step 5: Add The Shelf Across The Doorway
This is a more challenging step, but with careful measurement and execution, it can be done. Cut a piece of lumber to span the width of the doorway and attach it securely to the side shelves. Make sure it’s level and centered.
Step 6: Nail In Your Face Pieces
The face pieces give your bookshelves a finished look. Cut and attach these pieces to the front of the shelves, covering any exposed edges. Use a nail gun or hammer and nails to secure them in place.
Step 7: Caulk & Touch – Up Paint
After everything is assembled, use caulk to fill in any gaps or seams. This gives a smooth, professional finish. Then, do a final touch – up of the paint to cover any areas that may have been missed or damaged during the construction process.
Step 8: Let Cure & Decorate!
Allow the paint and caulk to cure completely before adding your books and decor. This is the fun part where you can personalize your built – in bookshelves, creating a space that reflects your style and interests.
With these steps, you’ll be well on your way to creating beautiful built – in bookshelves that will be the envy of your home. Have you ever attempted a similar DIY project? What challenges did you face, and how did you overcome them?

